

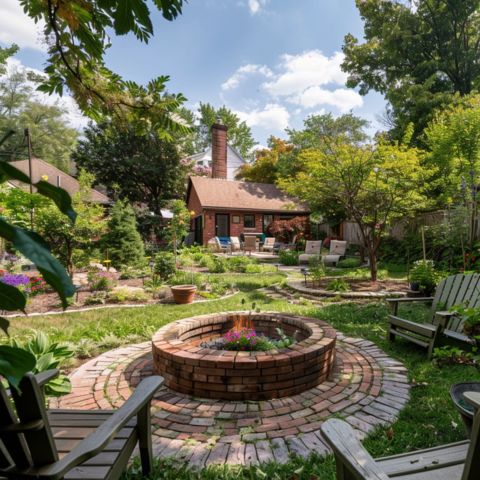
How To Build A Fire Pit With Bricks
Knowing how to build a fire pit with bricks will allow you to enjoy a campfire on your own property.
Building one in your backyard needs the right method. This article is packed with steps to create a sturdy brick fire pit.
Read on for tips that make it easy!
Necessary Tools for Building a Brick Fire Pit
Building a brick fire pit requires the right tools. These tools help in cutting, setting, and finishing the bricks accurately.
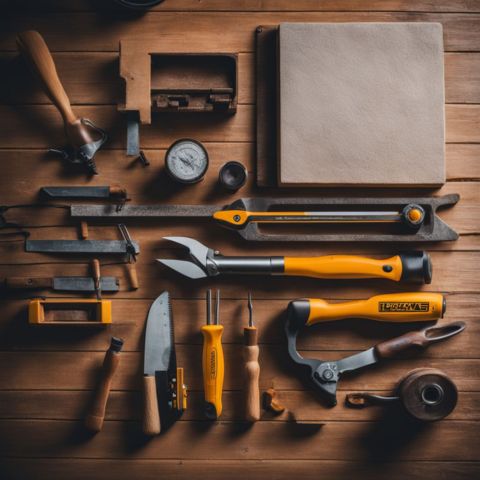
- Bolster: This wide chisel helps cut bricks to the right size. You need it to make clean cuts.
- Lump hammer: This heavy hammer works well with the bolster to split bricks or pavers.
- Brick trowel: Use this tool to spread mortar evenly over bricks. It helps lay them flat.
- Pointing trowel: This smaller trowel fills gaps between bricks with mortar. It's perfect for tight spaces.
- Pointer (tuck pointer): After placing the mortar, this tool smooths it out between the bricks for a neat finish.
- Spirit levels: These ensure your fire pit walls are straight and level in all directions.
It's important to work efficiently with mortar, adjusting your pace according to the specific drying time of the fire cement mix you're using, which can vary with weather and humidity levels.
Having these tools ready makes building your fire pit smoother and faster.
Required Materials for the Fire Pit
To build a fire pit with bricks, you need the right materials. This list points out everything necessary to get started.
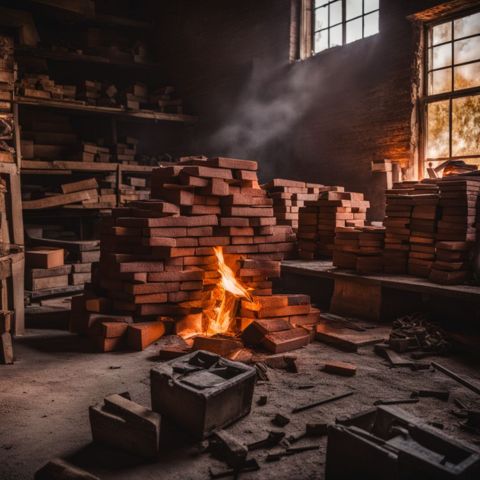
- Fire Bricks: Use firebricks for the inner lining of your fire pit, choosing a size that fits your design. These special bricks can handle high temperatures without cracking.
- Choose outdoor-use bricks that match the size of your firebricks for the exterior walls.
- Fire Cement: This binds your bricks together. Mix three parts sharp sand with one part fire cement for a strong mortar.
- Sharp Sand: It's coarse and grips well, making it perfect for mixing with fire cement.
- Hardcore Material: Place smaller stones or hardcore at the bottom of your pit. This aids drainage and stores heat.
- Rebar (Reinforcement Bar): Adding this strengthens the footing of your fire pit, ensuring it remains sturdy.
- Concrete Mix: You'll need concrete for the base footing, giving your fire pit a solid foundation.
- Masonry Tools: Including a brick trowel, pointing trowel, and pointer for applying mortar accurately between bricks.
- Spirit Levels: Essential for ensuring each layer of brick is even and your overall structure is level.
Gather these materials before starting your project to make building a brick fire pit smooth and successful!
Initial Steps for Building a Brick Fire Pit
Before starting your fire pit project, check local building codes and fire safety regulations to ensure compliance and safety.
Obtain any necessary permits to avoid legal issues and ensure your fire pit is built to safe and legal standards.
Then start by measuring and clearing the area for your brick fire pit, ensuring it's level and ready for construction.
Keep reading to learn how to build a cozy place for your backyard gatherings!
Digging Foundation
First, choose a spot for your fire pit and make sure it's flat.
Use a shovel to dig out the ground where you want your fire pit to be. The hole should be about 6 inches deep. This creates a solid foundation for your fire pit.
Next, fill the bottom of your hole with hardcore and smaller pebbles. These materials help with drainage and store heat when you use the fire pit.
Pack these materials tightly to make a firm base before moving on to the next step in building your brick fire pit.
Marking out the Fire Pit
After preparing the ground, it's time to shape where your fire pit will be. Grab a metal spike, some string, and a spray paint can.
Plant the spike in the center of where you want your fire pit.
Tie one end of the string to the spike and the other end to the spray paint can. The length of the string will determine how big your fire pit will be.
Walk in a circle while spraying paint on the ground. This marks a perfect circle for your fire pit.
Next, you need to remove all the grass and dirt inside your marked circle.
This step makes sure that when you pour your concrete base, it sits firmly on solid earth rather than loose topsoil or grass, which could shift over time.
It sets up a strong foundation so that your brick fire pit stays put for years to come.
Leveling the Pit
Use a long, straight board and a spirit level to make sure the base of your fire pit is flat. Place the board across the pit area and set the spirit level on top.
Check if the bubble stays in the middle; that means your surface is even.
If not, add or remove soil until it's just right.
Keep adjusting the dirt with a shovel or rake as needed. This step is crucial for making sure your fire bricks will sit evenly later on.
A well-leveled pit ensures that all parts of your fire pit are stable and safe once you start laying bricks and adding mortar.
Constructing the Fire Pit Base
To build a strong fire pit base, start by pouring concrete into the dug-out space. Add metal bars for extra strength before smoothing out the surface.

Pouring the Footing
This mix acts as a soakaway and stores heat, making your fire pit efficient. Pour this blend into the dug foundation. Make sure it's level before moving on.
Next, add rebar to strengthen the footing. Rebar is like a skeleton for your fire pit base. It keeps everything strong and in place.
After setting up the rebar, give the base time to dry thoroughly before building further.
Allow the base to dry thoroughly, which, depending on the concrete mix and environmental conditions, could range from 24 hours to several days, ensuring your fire pit foundation is solid and ready for the next steps.
Adding the Rebar
Arrange the rebar in a grid pattern, adjusting the spacing based on the size and expected load on your fire pit to ensure optimal strength and support.
Rebar goes at just the right depth for maximum strength in your fire pit base.
Secure the rebar tightly before pouring the concrete footing. This step prevents cracks and keeps your fire pit from moving over time, making sure it lasts longer.
Finishing the Footing
Smooth the concrete into a flat surface once you pour it. Use a trowel to make it even.
Make sure the footing is level, so your fire pit walls will be straight. Let this layer dry completely before moving on.
Before pouring the concrete, arrange the rebar in a grid pattern within the footing to ensure optimal strength.
This step ensures your fire pit can hold up against heat and weight. Check everything one more time for levelness before you let it set.
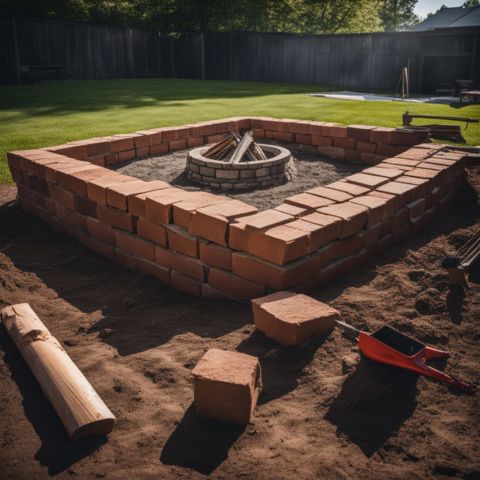
Building the Fire Pit
First, place the firebrick liner inside the pit without using mortar to see how it fits.
Next, use mortar to set these bricks firmly in place and begin shaping your fire pit's inner wall.
Dry-Setting the Firebrick Liner
Place the fire bricks inside the pit area without using mortar to see how they fit. Arrange them tightly together. This step shows where each brick will go.
After you arrange the fire bricks, take a photo or draw a diagram. This helps you remember their placement when it’s time to secure them with mortar.
Use a mix of three parts sand and one part fire cement for a strong hold.
Mortaring the Firebrick
Mix the mortar with a strong formula. Use three parts sharp sand and one part fire cement.
This makes the mix sturdy, perfect for the fire pit. Apply the mortar carefully to each firebrick, ensuring thorough coverage for a strong bond.
Work with a balance of speed and accuracy, keeping in mind the quick setting time of fire cement.
Lay each brick carefully, pressing it into place. Check that every brick is level as you go along.
This step ensures your fire pit walls are straight and safe for use. Keep tools like a trowel and level handy to smooth mortar and adjust bricks as needed.
Creating Air Holes
After mortaring the firebrick, it's time to focus on the air holes.
These are crucial for oxygen flow inside your fire pit. Drill small openings in the firebrick using a power drill. Make sure these holes are evenly spaced out.
For good airflow, place each hole about 6 inches apart from each other.
This step helps your fire breathe and burn brightly. Use safety gear like gloves and goggles while drilling to protect yourself.
Completing the Outside Walls with Face Bricks
Once you've made air holes, start working on the outer walls. Use 65 mm engineered bricks for this part.
This will make your fire pit strong and look good. First, cut half of these bricks by using a hammer and chisel.
Next, lay these half bricks around the outside of your fire pit. Do this carefully to ensure they fit well together.
Use mortar to hold them in place. Take your time here; proper setting prevents gaps where smoke could escape later on.
Striking the joints gives everything a smooth finish and improves its durability against weather damage.
Finalizing the Fire Pit
To finish your fire pit, you'll split bricks for a perfect fit and lay them neatly around the edge.
Then, use a metal tool to smooth out the spaces between bricks for a clean look.
Splitting Bricks in Half
You'll need to split some bricks in half for your fire pit. Grab a bolster and a lump hammer for this job. Place the bolster on the brick where you want it to split.
Hit the top of the bolster with the lump hammer firmly.
The brick should break into two pieces easily.
Next, smooth out any rough edges on these halves before setting them into place.
This step is crucial for making sure your fire pit looks neat and professional.
Practice makes perfect, so don't worry if you don't get it right on the first try!
Setting the Face Brick
After the firebrick layer is in place, it's time to work on the outer skin with engineered bricks.
Mix sand and cement together to create a strong bond for these bricks. Lay them around the circle of your pit area, one by one.
Make sure each brick sits snugly against its neighbor and lines up straight.
Next, use a level tool often during this process.
This ensures your circle stays true and looks great. If you find any gaps between the bricks, fill them with more mortar mix.
Keep going until your ring of engineered bricks forms a solid wall around your firepit area.
Striking the Joints
To strike the joints, use a pointing tool. Move it smoothly along each seam to press and shape the mortar.
This step makes sure all spaces and commercial courtyards are filled and gives your fire pit a neat, finished look.
Doing this right helps keep your structure strong by locking bricks tightly together.
Regularly brush off any excess mortar from brick surfaces with a soft broom or hand brush to maintain a clean work area.
This cleanup is essential for a clean appearance. The goal is to have sharp lines and an overall tidy fire pit ready for gatherings around the warm flames.
Finishing the Top Lip
After striking the joints, it's time to work on the top edge.
This part needs a strong mix of mortar, made from three parts sharp sand and one part fire cement. Use a pointing trowel to fill gaps and smooth out this upper edge.
This makes your fire pit safe and gives it a finished look.
Prepare the mortar mix with attention to consistency, keeping in mind that fire cement has a rapid setting time.
Lay engineered bricks around the top, embedding them in the mix for a tight fit. Make sure everything's even before you finish up.
Let this sit untouched for at least 10 days before using your fire pit to ensure everything is set properly and securely.
Filling Gaps
To fill gaps between the bricks, use a small trowel to push the strong mortar mix into any spaces.
Make sure every gap is filled so your fire pit stays sturdy. The right blend of sharp sand and fire cement keeps heat from damaging the structure.
This step is crucial for your fire pit's durability.
Next, smoothing out all the mortar joints gives your fire pit a clean look. A jointer tool helps make them look even and professional.
Once you fill and smooth all the gaps, let everything dry completely before lighting a fire in it.
This takes about 10 days. Moving on to the final touches will really make your brick fire pit stand out.
FAQs
Where can I find bricks to build a fire pit?
You can buy bricks for your fire pit at local brickyards or home improvement stores. Make sure you choose the right kind of bricks that can stand high heat.
What tools do I need to make a brick fire pit?
To build a brick fire pit, you will need some basic tools, like a shovel for digging, a level to make sure your base is even, and possibly a grinder if you need to cut any bricks to fit.
How do I ensure my brick fire pit is safe and private?
When building your brick fire pit, consider placing it in an area away from overhanging trees or bushes for safety. For privacy, think about adding elements like a retaining wall or tall plants around your fireplace area, where you'll enjoy the warmth and roast marshmallows.

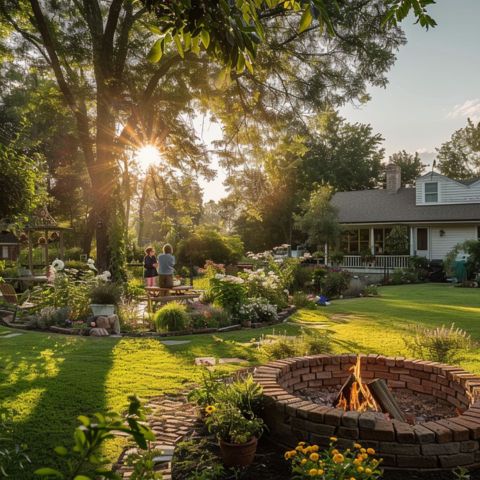
Conclusion
Discovering how to build a fire pit with bricks is doable and rewarding.
You'll need basic tools like a trowel and hammer, along with special bricks designed to handle heat.
Follow each step carefully, from preparing the base to laying the bricks with the right mortar mix.
This project lets you create a cozy spot for gatherings or even cookouts. Enjoy your new brick fire pit, a perfect addition to any backyard.