
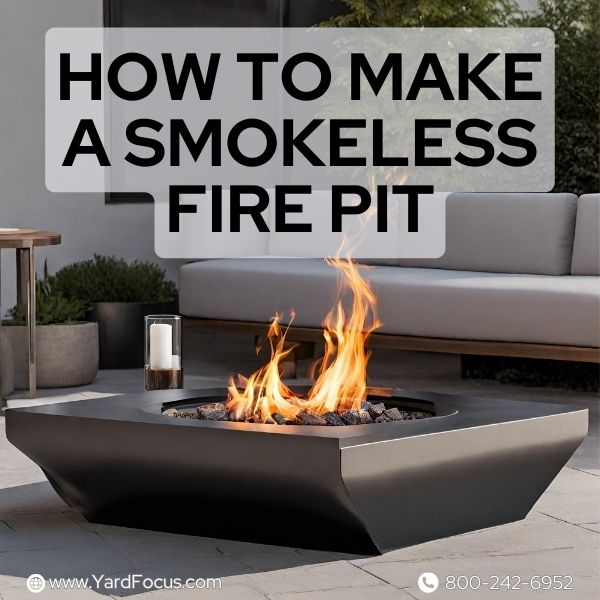
How To Make A Smokeless Fire Pit
A smokeless fire pit is designed to significantly reduce the amount of smoke produced by burning wood, through enhanced airflow and combustion efficiency.
This is achieved by maximizing airflow and using special designs that push the smoke back into the fire.
Have you thought about learning how to make a smokeless fire pit? A DIY (do-it-yourself) project can be fun and rewarding.
This guide will give you the information you need to make your own smokeless fire pit.
First we will start off by explaining what makes a fire pit smokeless.
What makes a fire pit smokeless?
A fire pit becomes smokeless when it improves airflow and combustion. Good airflow lets more oxygen reach the fire.
This makes the fire burn hotter. A hot fire uses up all the wood without leaving a lot of smoke behind.
The design is also crucial. Smokeless fire pits are engineered to pull in cold air from outside, which is then heated as it passes through a chamber.
This hot air is finally expelled at the top, contributing to the combustion process and reducing smoke.
The key is to have both primary ignition and secondary combustion working together.
Primary ignition starts the fire with small flames at first. Then, heated oxygen travels up, causing secondary combustion near the top of the pit.
This burns off smoke particles that would otherwise escape into the air. Now let's look into how this type of fire pit actually works.
How does a smokeless fire pit work?
A smokeless fire pit uses a smart design to reduce the smoke it emits. It heats air and forces it out over the flames in what is called secondary combustion.
This process burns off the wood gases that would normally become smoke.
For secondary combustion to occur effectively, the combustion zone within the pit must reach high temperatures, typically in the range of 550-700 degrees Fahrenheit, though this can vary based on design and materials.
The fire pit has special holes drilled into it which play a big part in keeping the airflow right.
These half-inch holes pull in cold air from outside, heating it up as it moves through hidden chambers around the firebox before pushing it out at high speed over the fire.
This blast of preheated air is crucial for igniting unburnt gases, significantly reducing smoke production.
It achieves this by promoting more complete combustion of the wood, where higher temperatures ensure that more particulate matter and gases are burned off before they can escape as smoke.
Steps to Building a DIY Smokeless Fire Pit
Building your own smokeless fire pit is simple and rewarding. Follow these steps for a cleaner, more enjoyable outdoor experience.

Selecting the ideal location
Choose a spot for your fire pit that is far from houses and trees. This helps keep everyone safe.
Your fire pit needs space where air can move well to make the fire burn without smoke.
Look for a place on your land that doesn't get too windy. Too much wind can blow smoke around, even with a good design.
Flat ground works best for building your stone base stable and strong.
Remember, adherence to local regulations and safety codes is paramount, not just for legality but for the safety and success of your project.
Building a stone fire pit base
Start by selecting fire pit stones that are heat-resistant and can handle high temperatures without cracking.
It's recommended using lava rock or other durable materials that won't easily break down over time.
Lay the stones in a circular pattern on level ground to form a stable base for your fire pit. Make sure each stone fits tightly against the others to prevent any shifts.
Next, ensure the base layer is thick enough to insulate the ground from the heat of your fire.
Ensuring that each layer is level is critical for creating a stable and even surface, which is necessary for the additional layers of stones and overall structural integrity of the fire pit.
This step is crucial in building a strong foundation for your smokeless fire pit that lasts through many uses while maintaining its integrity and safety features highlighted in fire safety guidelines.
Installing the fire pit ring
Place the fire pit ring in the center of your stone base. Make sure it sits evenly to avoid tilting. Use a level for accuracy if needed.
This step is crucial because the ring acts as a barrier, keeping your fire contained and safe.
It also focuses the heat, adding to the efficiency of your smokeless design.
Next, secure the ring by stacking more stones around it. These stones should not only support the ring but also integrate it smoothly into the whole fire pit structure.
Ensure they are tightly packed with no gaps where flames could escape uncontrollably.
This will help maintain a steady airflow and contribute to a smokeless combustion process.
Ensuring proper airflow at the bottom of the fire
To ensure proper airflow at the bottom of the fire, remove four pavers from the bottom row of your fire pit.
This step creates more room for air to circulate, making your fire burn cleaner with less smoke.
Airflow is key in a smokeless fire pit.
Next, make sure your fire pit ring fits snugly inside the stones but leaves a 2-3 inch gap all around.
This gap helps air move freely around and under the fire.
The insert should be a bit shorter than the walls of the pit and feature a wide lip at the top to aid in air circulation.
Proper setup guarantees that fresh air feeds the flames from below, reducing smoke output significantly.
Utilizing the Smokeless Fire Pit Technology
Learn how to use smokeless fire pit technology and make your outdoor gatherings more enjoyable.

Importance of secondary combustion
Secondary combustion plays a crucial role in creating a smokeless fire pit.
This process involves heating oxygen that then feeds the fire from below, allowing for a more efficient burn.
As oxygen reaches the fire, it travels up and out through meticulously drilled holes at the top of the fire pit ring.
This action ignites unburned gases in the smoke and significantly reduces the amount of smoke produced.
This technique is key to ensuring your campfire or solo stove burns cleaner and more efficiently.
By providing a secondary source of oxygen directly to these gases, you essentially enable a second burning phase which cuts down on smoke output.
Unlike traditional fires that only get oxygen from above and result in incomplete combustion, this method ensures every bit of fuel has the chance to fully combust, making your outdoor experience much more enjoyable without all the smoke.
While this design significantly reduces smoke output, a completely smoke-free experience is challenging to achieve due to the variability of wood combustion.
Optimum number of holes to drill
For optimal airflow, drill holes around the top of your fire pit ring, spacing them evenly.
The exact number and size of these holes can vary depending on your fire pit's design and size, but a common approach is to start with several half-inch diameter holes spaced about one and a half inches apart.
This setup ensures that airflows efficiently, supporting combustion at high temperatures and reducing smoke production.
Proper spacing allows for optimal secondary combustion, where unburnt particles in the smoke get ignited.
At the bottom of the fire pit ring, you should have 24 holes that are each one inch in diameter.
Make sure these are spaced three and three-quarter inches apart.
These larger holes at the base play a crucial role in primary ignition by allowing enough oxygen to reach the initial flames.
This design keeps your fire burning steadily while minimizing smoke right from the start.
Importance of primary ignition
Primary ignition plays a key role in smokeless fire pits. It helps oxygen reach the fire from below, making the fire burn more efficiently.
This means your fire pit burns hotter and with less smoke compared to traditional ones.
Smoke often comes from fires that don't get enough air. By ensuring proper primary ignition, you avoid this problem.
Properly starting your fire supports secondary combustion as well. This process reduces smoke by burning it off before it can escape into the air.
A strong start leads to a cleaner burn all around, making your gatherings more enjoyable and less smokey.
Drilling supply holes
Drilling supply holes is a crucial step for making your fire pit smokeless.
First, you need the correct tools like a drill bit and center punch from your toolkit.
Mark where you'll drill around the fire pit ring for even airflow. These holes let in air that fuels the secondary combustion, cutting down on smoke.
Ensure you drill the optimum number of holes without weakening the structure of your fire pit.
This process boosts primary ignition and keeps your fire burning cleanly with minimal smoke output.
Testing and Troubleshooting Your DIY Smokeless Fire Pit
After you build your smokeless fire pit, it's time to test it. If you see smoke leaking out, check for cracks and ensure your airflow is correct.

What to do if smoke escapes through cracks
If smoke leaks through cracks, it's time to act fast. First, let the fire die down a bit for safety.
Then grab your caulking gun filled with high-temperature sealant suitable for outdoor use.
Carefully apply this sealant into any visible cracks where the smoke is escaping. This simple fix stops smoke in its tracks and restores your fire pit's efficiency.
For ongoing maintenance, inspect your fire pit regularly for new cracks or signs of wear.
Sealing these early keeps your fire pit performing well and remains a cozy, smoke-free zone for everyone to enjoy.
Always ensure there’s enough airflow at the bottom of the fire pit to keep it burning cleanly.
What to put at the bottom of your fire pit
Use sand or gravel at the bottom of your fire pit, within a metal liner, to distribute heat evenly and prevent extreme temperatures from damaging the base or the surrounding area.
Gravel allows for good drainage and airflow, which are key for a smokeless fire.
Both materials support proper combustion.
Adding a layer of crushed lava rocks over the sand or gravel also boosts drainage and airflow.
This setup encourages efficient burning by enhancing oxygen supply to the flames. It's crucial for making your fire pit work without creating much smoke.
Choosing the Right Materials for Your Smokeless Fire Pit
Picking strong fire pit stones and a durable fire pit ring is crucial. These materials ensure your smokeless fire pit lasts long and works well.
Selecting fire pit stones
Select fire pit stones by laying them out in a circle, matching the size of your fire pit ring.
Measure the inner diameter of this stone arrangement to ensure it smokeless fire pit design.
Correct measurement is key for proper placement and stability of the stones around your fire pit.
Use stones that can handle high heat without cracking. Look for options at local hardware stores or landscaping suppliers.
Ensure each stone is about the same size for a uniform look.
This careful selection helps create an efficient and attractive smokeless fire pit that lasts for years.
Choosing a fire pit ring
For a smokeless fire pit, finding the right ring is key. You want to measure the inner diameter of your fire pit stones to ensure the ring fits perfectly inside.
This step prevents smoke and increases airflow at the bottom of your fire.
A good fit keeps your fire burning bright and clean.
Look for a fire pit ring that promotes increased airflow. This feature is crucial for minimizing smoke production.
The ideal ring also should have holes for heated oxygen to shoot out, supporting secondary combustion.
This technology plays a big part in achieving a smoke-free burn every time you light up your DIY project.
Safety Measures to Consider When Using a Smokeless Fire Pit
Always check with utility companies before you start digging for your smokeless fire pit.
This step keeps you safe by making sure you don't hit any gas or water lines underground.
Also, make the ground flat and fire-resistant where your fire pit will sit.
These precautions prevent accidents.
Sand down drilled holes in the tank ring carefully to remove sharp edges. Sharp edges can cut you while setting up or enjoying your fire pit.
Making these surfaces smooth protects everyone who comes near the fire pit from getting hurt.

FAQs
What do I need to make a smokeless fire pit?
To build a smokeless fire pit, you'll need dry, seasoned firewood and basic construction tools. A router bit may be necessary for shaping parts if customizing the design. Focus on creating a structure that facilitates airflow and complete combustion.
Is it possible to add decorations around my smokeless fire pit?
Absolutely! You can use glue to attach decorative items such as coffee mugs or stones around the pavement area of your fire pit for a personalized touch.
What kind of wood should you use for a smokeless fire pit?
Dry, seasoned hardwood is suggested for the best experience.
Conclusion
Building a smokeless fire pit brings the joy of outdoor fires without the annoyance of smoke.
With the right materials and a bit of effort, anyone can create one in their backyard.
This guide walks through each step, ensuring clarity on airflow and combustion principles essential for eliminating smoke.
Engage with this project to transform how you experience fires outdoors.
Before beginning your project, it's crucial to check with local authorities regarding any regulations or codes that apply to outdoor fire pits in your area, ensuring your project complies with all safety and environmental guidelines.